Am I snapping my Steller Planks in correctly?


If you feel like it is more difficult than it should be to install your Steller Planks, this video is the best place to start!
Tips and tricks -
1) Ensure your subfloor meets flatness and firmness specs - being outside the range makes installation more difficult - but not impossible.
2) Ensure your installation envrionment matches the acclimation of your planks - your planks may need more time to acclimate.
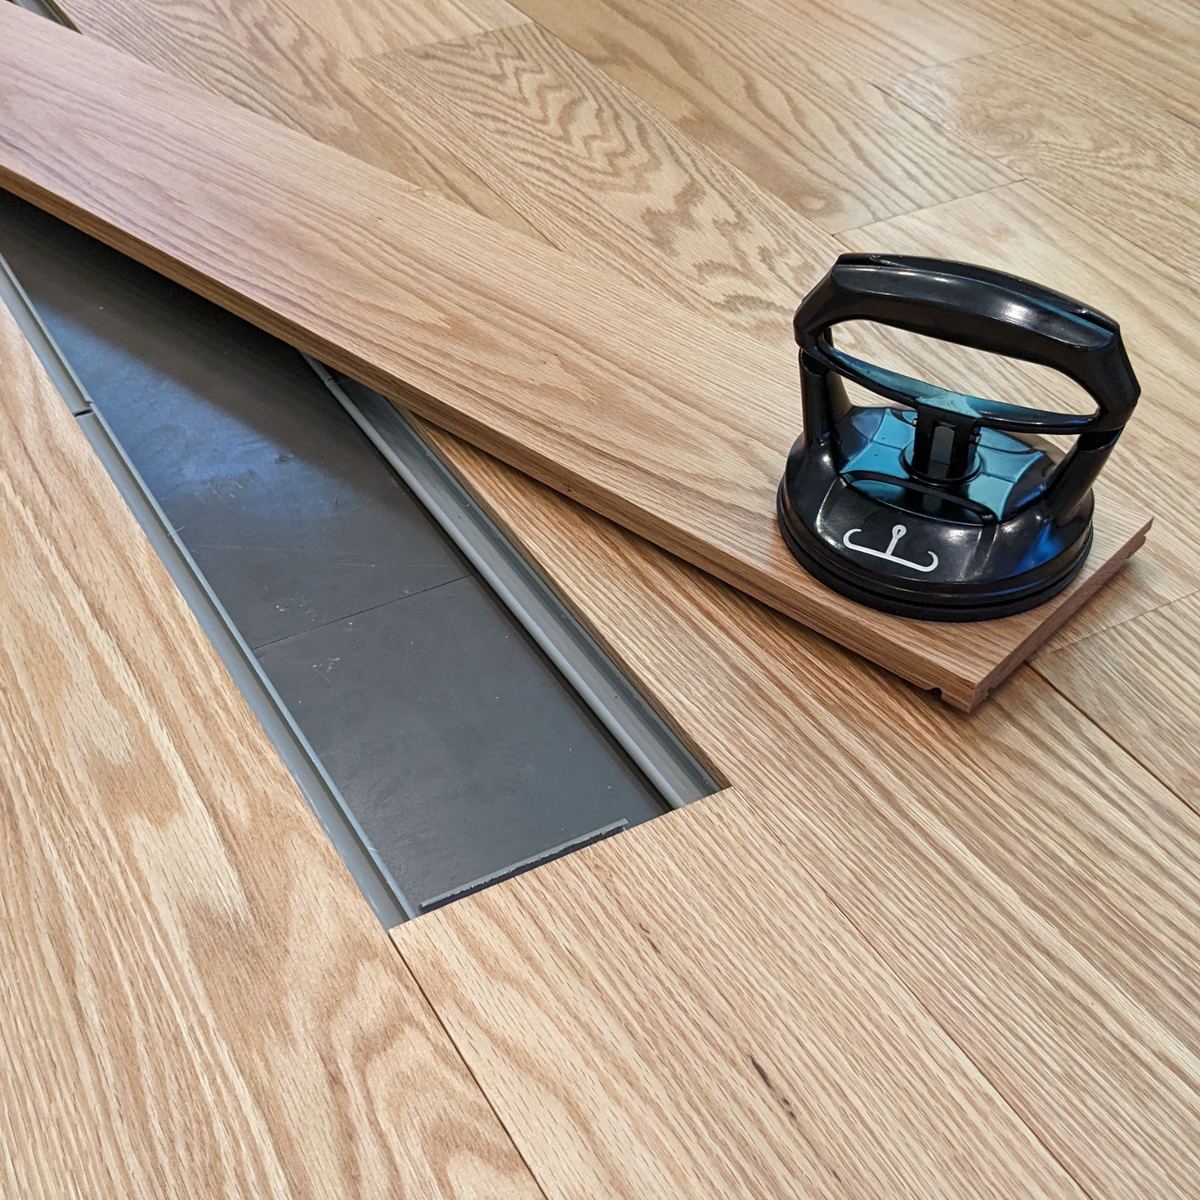
3) Always connect clips to the side of planks - never slide them on from one end.
4) When you snap planks together, you need to hold the existing plank still (usually with your own body weight) and always start from one end and work towards the other end like a zipper.
5) Always preassemble planks in long rows instead of installing one plank at a time.
What could be going wrong?
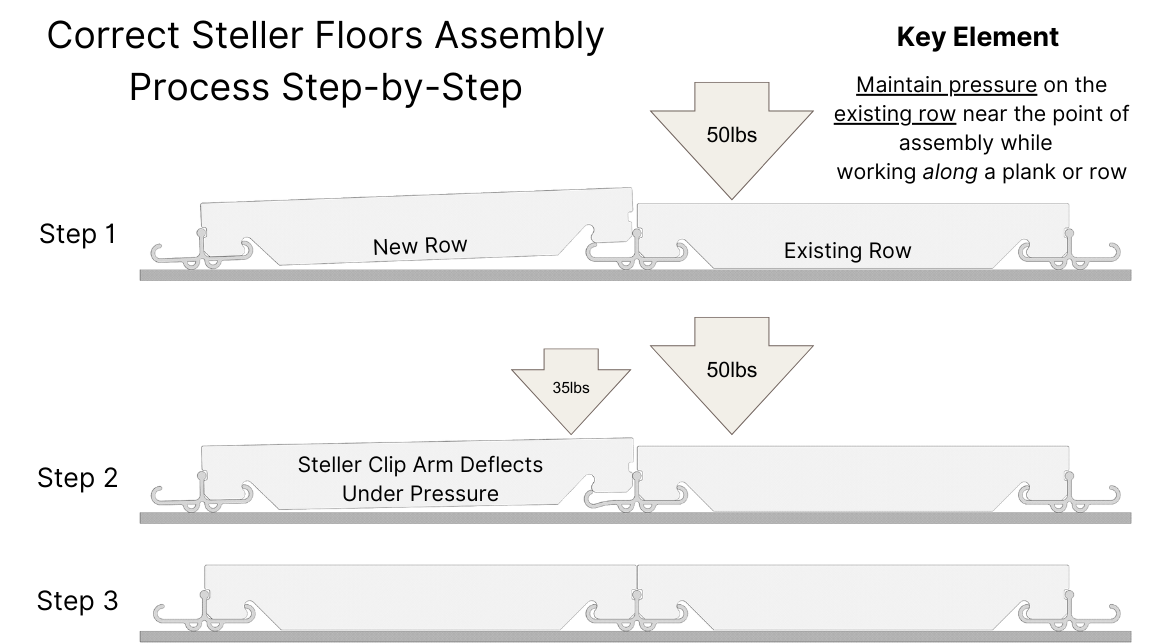
When you don't hold the plank down properly you will feel like the clip is rejecting the plank or that the clip is rocking out of the way underneath the board.
That's because hitting the second plank to install it causes the first plank to move the attachment clip to an angle that is incompatible with attachment. It does not matter how hard you hit it - you will break planks or clips before it ever engages. You must put weight down on the plank with two clips as shown above.
.png)
In rare cases, other issues can be at play
If you have not prepared your subfloor or have a squishy underlayment, or your planks are mid-way through acclimation, your install can feel more difficult than advertised. Please review these articles and contact support if you feel none of these issues could be the cause.
Pro tip: Don't forget to practice installing planks in the middle of the room, and make sure that you're on a flat and firm subfloor area so that you can get the hang of the assembly method before you get started.
Reach out for Steller Support!
We can help you troubleshoot over the phone, by email, or by video appointment from our studio! 1-800-955-7671 or support@floorsbysteller.com


